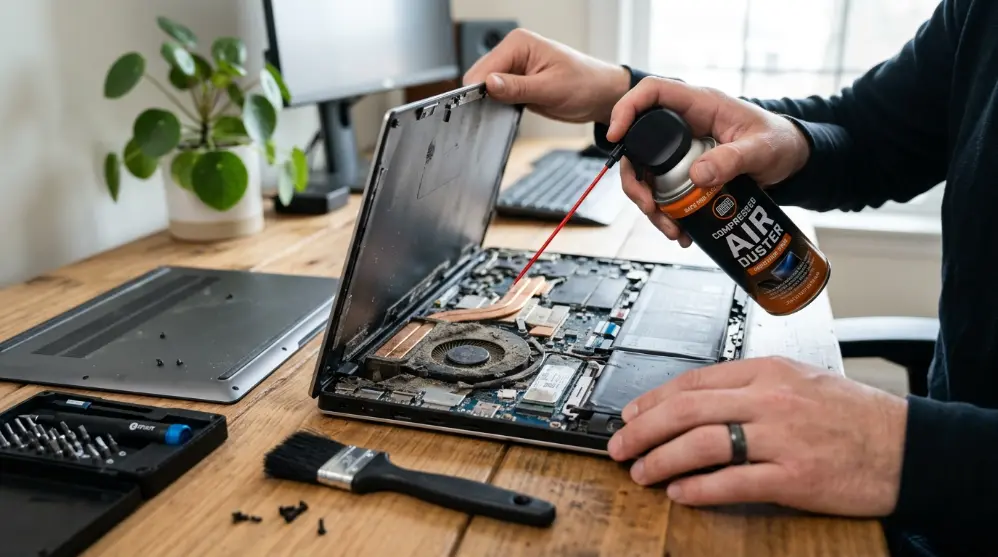
Your laptop’s fan keeps it cool, but dust can block the fan and air vents over time. When this happens, your laptop may get hot, make loud noises, or slow down while you work or play games.
The good news is that you can clean a laptop fan at home with a few simple tools. You don’t always need to open your laptop. A quick clean through the air vents may help remove loose dust. However, if there’s a lot of dust inside, you may need to open the back cover for a deeper clean.
In this guide, you’ll learn how to clean a laptop fan safely, both with and without opening the laptop. We’ll also cover the tools you need, common mistakes to avoid, and simple tips to keep your laptop cool.
Why Should You Clean Your Laptop Fan?
A laptop fan pulls in air and pushes hot air out. This helps keep the inside parts cool while you use your computer.
But dust, hair, and dirt can build up inside the fan and air vents. When airflow gets blocked, your laptop may struggle to stay cool.
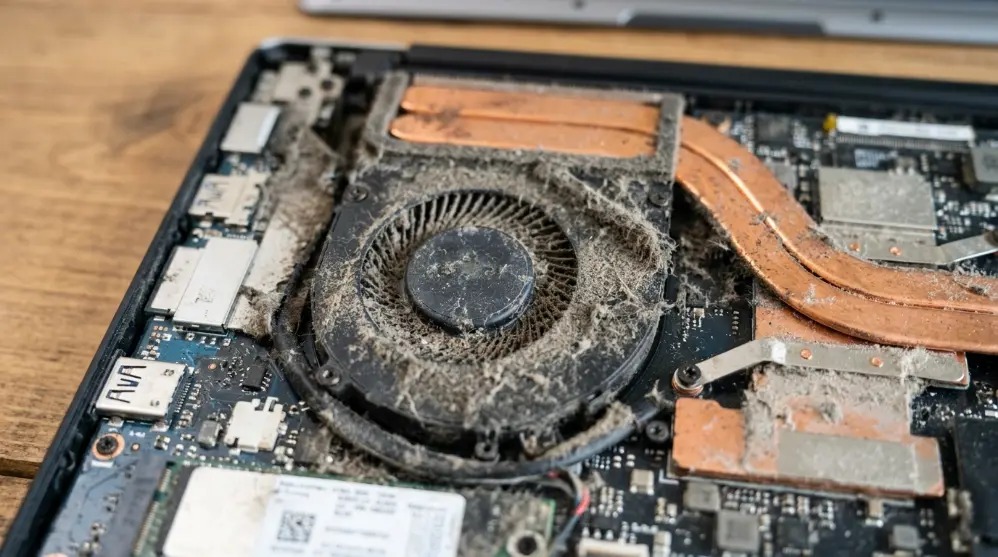
Here are some common signs that your laptop fan needs cleaning:
- Loud fan noise: The fan runs faster and makes more noise than usual.
- Overheating: Your laptop feels very hot during normal use.
- Slow performance: Your laptop may slow down when it gets too hot.
- Poor airflow: You can feel little or no air coming from the exhaust vent.
- Unexpected shutdowns: Your laptop may turn off to protect its parts from heat.
If you notice these problems, dust could be one reason. However, other issues, such as a faulty fan or old thermal paste, can also cause overheating.
Cleaning the fan can help improve airflow and cooling. It won’t fix every laptop problem, but it’s a good first step when dust is the cause.
In the next section, let’s look at the tools you’ll need before starting.
What Tools Do You Need to Clean a Laptop Fan?
Before you start cleaning, collect a few simple tools. Having everything ready will make the job easier and help you avoid damage.
You don’t need expensive equipment for basic laptop fan cleaning.
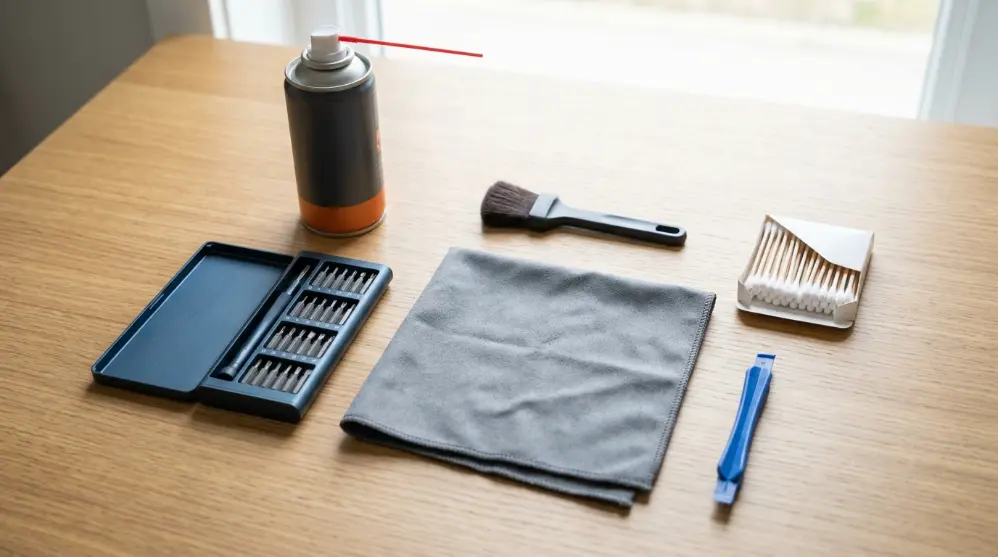
Here are the tools you’ll need:
1. Compressed Air Can
Compressed air is one of the easiest ways to remove loose dust from laptop fans and air vents.
It blows dust out of small spaces that are hard to reach with your fingers.
Tip: Keep the can upright and use short bursts. Don’t spray continuously.
2. Soft-Bristle Brush
A small, soft brush helps remove dust stuck to fan blades and other parts.
You can use a clean, dry toothbrush if you don’t have an electronics cleaning brush.
Don’t press hard or scrub the fan blades. Gentle movements are enough.
3. Small Screwdriver
You’ll need a small screwdriver if you plan to open your laptop.
Most laptops use small Phillips or Torx screws, but the exact type depends on the model.
Use the correct screwdriver to avoid damaging the screw heads.
4. Plastic Opening Tool
A plastic opening tool helps you remove the laptop’s bottom cover.
It can reduce the risk of scratches compared with using a metal tool. Still, open the cover gently because some laptops have hidden screws or delicate clips.
5. Microfiber Cloth
Use a clean microfiber cloth to wipe dust from the laptop’s outer body.
Avoid using a wet cloth near the fan, motherboard, or other internal parts.
6. Isopropyl Alcohol (Optional)
Isopropyl alcohol can help remove stubborn dirt from some internal surfaces.
If needed, use a small amount on a cotton swab. Never pour or spray alcohol directly onto the laptop.
Let the area dry fully before reconnecting power.
Important: You don’t need every tool for basic cleaning. A can of electronics-safe compressed air and a microfiber cloth may be enough for a quick external clean.
Safety Steps Before Cleaning Your Laptop Fan
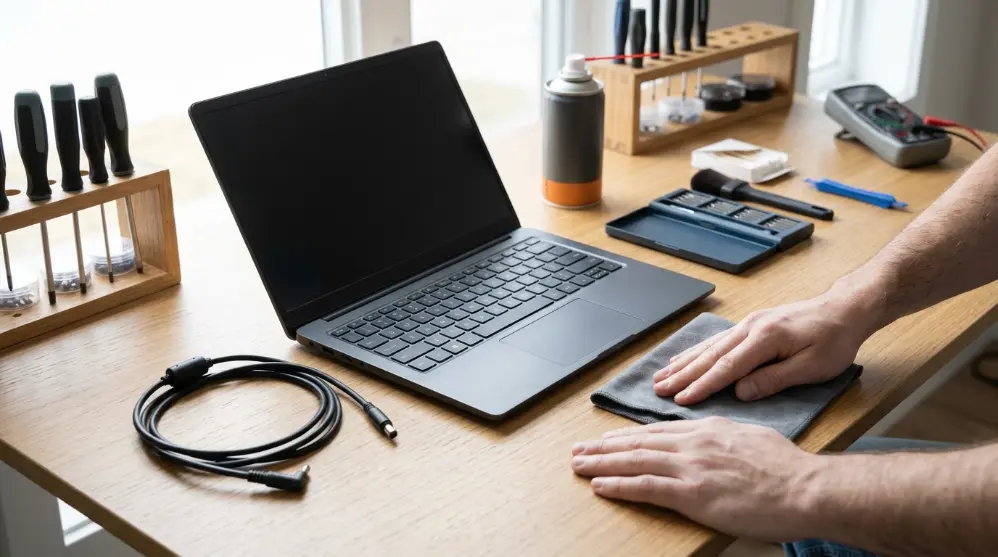
Before you start, take a few minutes to prepare your laptop. This step is important because one small mistake can damage its internal parts.
Follow these safety steps:
- Shut down your laptop: Turn it off completely. Don’t leave it in sleep mode.
- Unplug the charger: Remove the power cable and any connected USB devices.
- Let it cool down: Wait until your laptop is cool before cleaning.
- Remove the battery: If your laptop has a removable battery, take it out.
- Work on a clean surface: Place your laptop on a dry, flat table.
- Avoid static electricity: Don’t work on carpets. Touch a grounded metal surface before handling internal parts.
- Check your warranty: Read your laptop manufacturer’s warranty and service instructions before opening the case.
If your laptop has an internal battery, disconnecting it may be necessary before internal cleaning. Only do this if you know how to open your laptop safely and follow its official repair instructions.
Remember: Never clean your laptop while it’s running or connected to its charger.
How to Clean a Laptop Fan Without Opening It
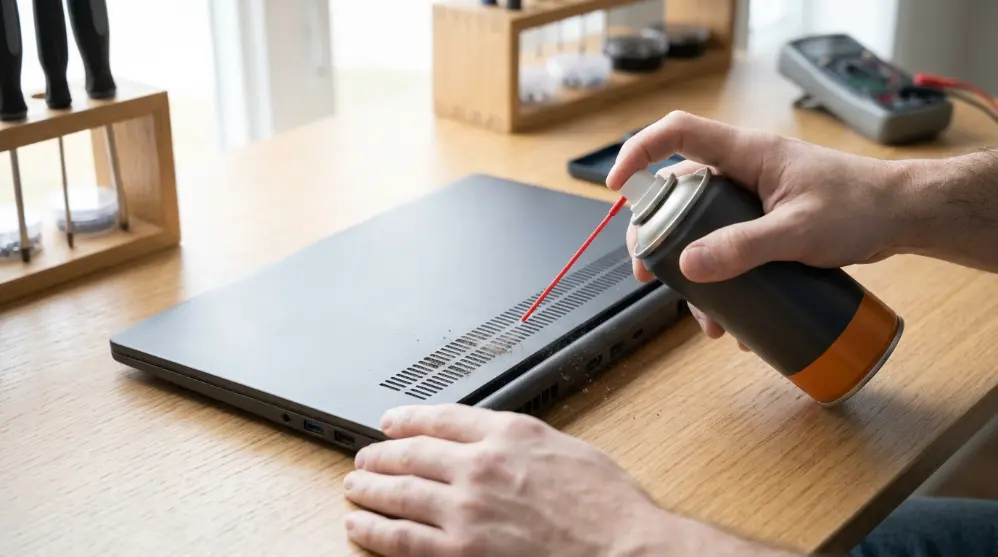
Don’t want to remove your laptop’s back cover? No problem! You can try cleaning the fan through the air vents without opening the laptop.
This method is best for removing loose dust from the vents. It may not remove thick dust stuck inside the fan or heatsink.
Follow these simple steps.
Step 1: Turn Off Your Laptop
First, shut down your laptop completely.
Don’t use sleep mode. Unplug the charger and remove any connected devices.
Wait a few minutes so the laptop can cool down before cleaning.
Step 2: Find the Laptop Air Vents
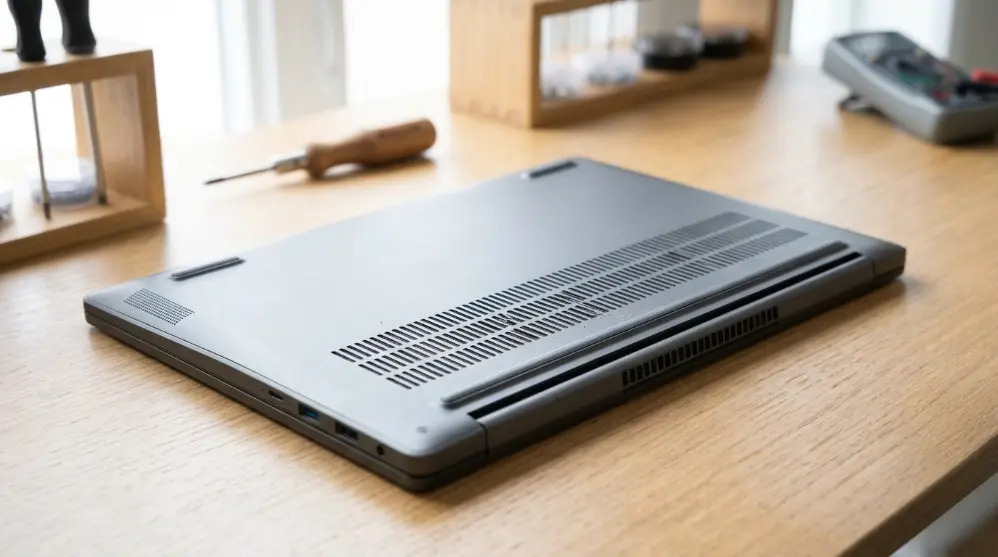
Now look for the air vents on your laptop.
You’ll usually find them:
- On the bottom of the laptop.
- Along the left or right side.
- Near the back of the laptop.
Some laptops have intake vents underneath and exhaust vents near the back.
Check your laptop’s manual if you can’t find them.
Step 3: Use Compressed Air
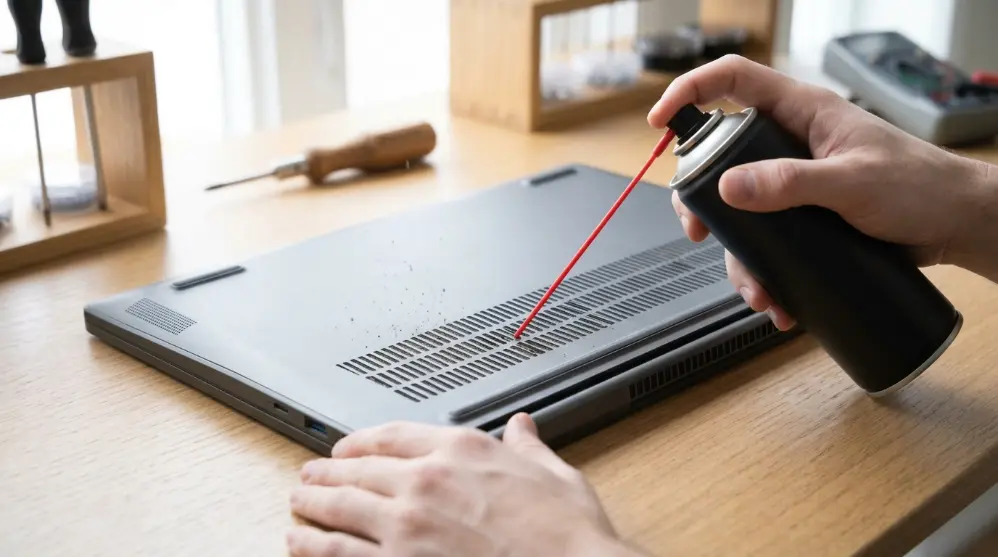
Take an electronics-safe compressed air can.
Follow these tips:
- Keep the can upright.
- Hold it at the distance recommended on its label.
- Use short bursts of air.
- Clean the vents gently.
- Avoid spraying for too long in one spot.
Don’t shake or tilt the can while spraying. Liquid from the can could damage your laptop.
Important: Cleaning through the vents isn’t as effective as cleaning the fan directly. Dust may move deeper inside instead of coming out.
Step 4: Clean the Outside Vents
After using compressed air, check the outside vents.
If you see dust around the openings, gently remove it with a clean, soft brush.
Don’t push the brush deep inside the vents. You could damage the fan or other parts.
Step 5: Turn On Your Laptop
Once you’ve finished cleaning, check that the outside of the laptop is dry and free of loose dust.
Reconnect the charger and turn on your laptop.
Listen to the fan and check whether air is coming out of the exhaust vent.
If the fan is still loud or your laptop keeps overheating, there may be dust inside the fan or heatsink.
In that case, a deeper clean may be needed.
Quick Tip: If you don’t have compressed air, don’t blow into the vents with your mouth. Moisture can enter the laptop. A soft brush can remove loose dust from the outside, but it won’t clean deep inside.
How to Clean a Laptop Fan by Opening the Back Cover
If your laptop has a lot of dust inside, external cleaning may not be enough.
Opening the back cover gives you better access to the fan and heatsink. However, this method needs more care.
Only try it if you’re comfortable working with small laptop parts. If not, ask a laptop repair technician for help.
Step 1: Shut Down and Unplug the Laptop
Turn off your laptop and unplug the charger.
Remove the battery if it’s removable.
Wait until the laptop cools down completely before opening it.
Step 2: Remove the Bottom Cover
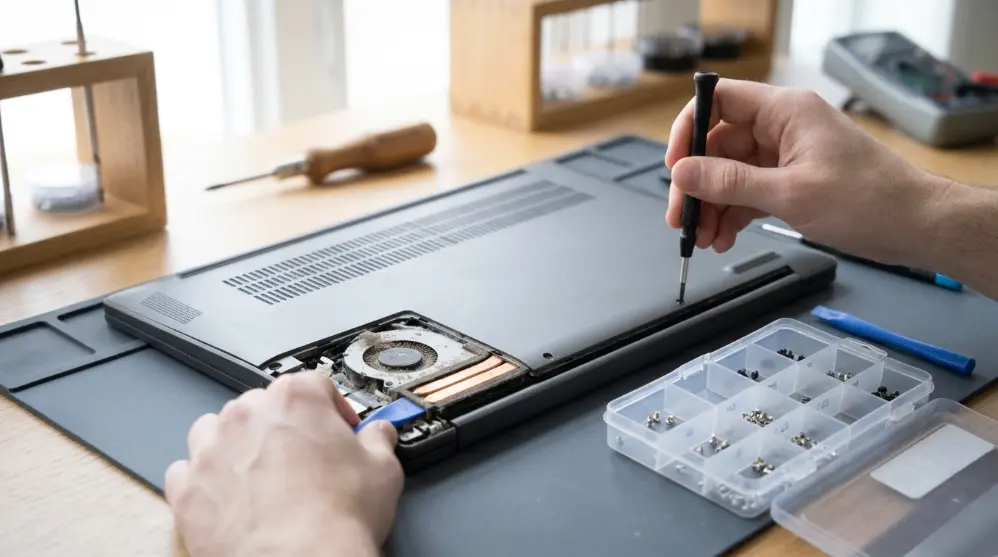
Use the correct screwdriver to remove the screws from the bottom cover.
Keep the screws in a small container so you don’t lose them.
Gently remove the cover using a plastic opening tool.
Don’t force it. Some laptops have hidden screws or clips that can break if you pull too hard.
Step 3: Disconnect the Internal Battery
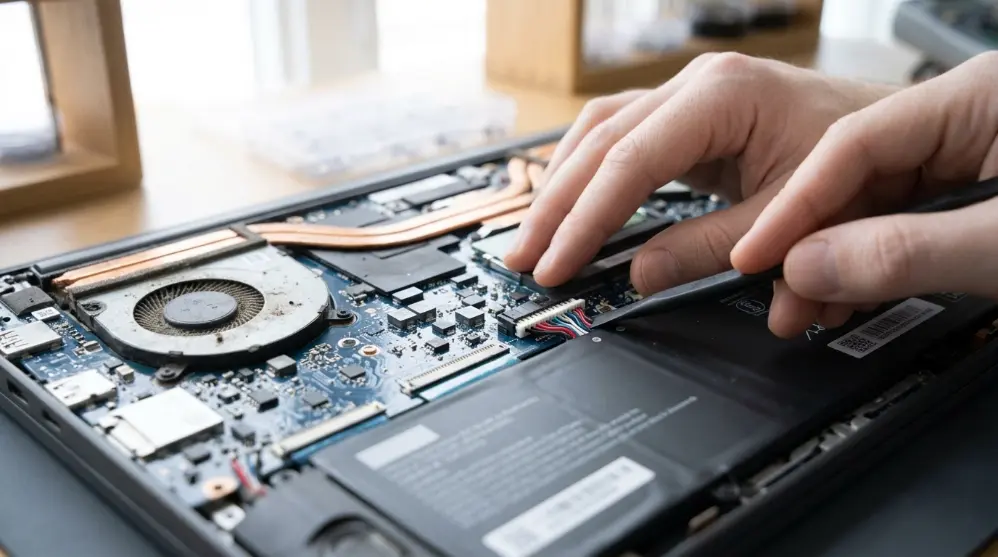
Before touching the fan or motherboard, disconnect the internal battery if your laptop’s service guide requires it.
Be gentle with the connector. Don’t pull its wires or use a metal screwdriver to pry it out.
If you’re unsure how to disconnect the battery, stop and ask a technician.
How to Clean Laptop Fan Blades and Heatsink
After opening the laptop and disconnecting the battery, you can access the cooling fan and heatsink.
These parts are important because they help move hot air out of your laptop.
Follow these steps to clean them safely.
Step 4: Find the Cooling Fan

Look inside your laptop for the cooling fan. It’s usually a round or square part connected to copper heat pipes and a metal heatsink.
You may see one or two fans, depending on your laptop model.
Before cleaning, check whether you can reach the fan without removing other parts.
Don’t remove the fan unless your laptop’s repair guide explains how to do it.
Step 5: Hold the Fan Blades Still
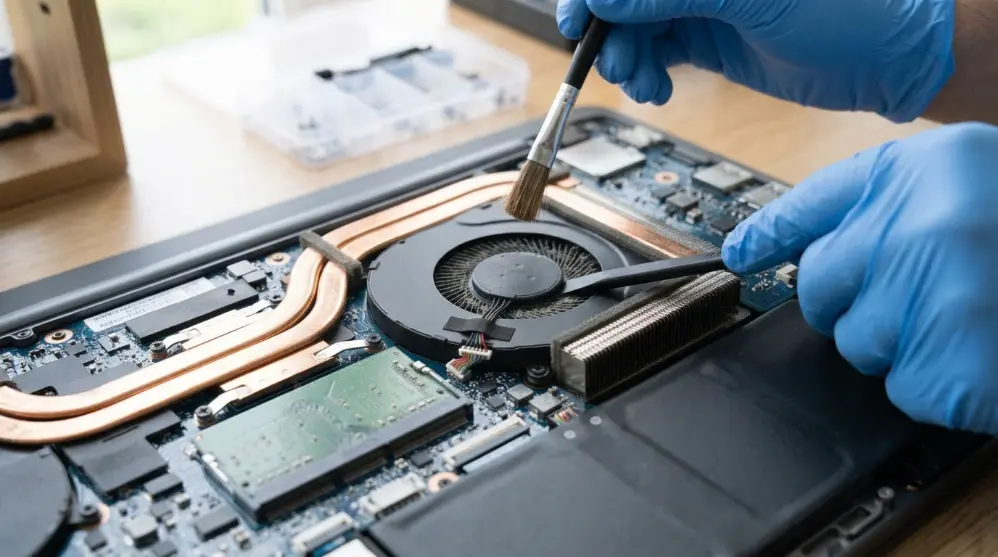
This is an important step.
Before using compressed air, gently hold the fan blades in place with a plastic tool or your finger.
Why?
Strong air can make the fan spin very fast. This may damage its bearings or cause unwanted electrical current.
Keep the fan still while cleaning. Don’t push hard on the blades.
Step 6: Remove Dust With Compressed Air
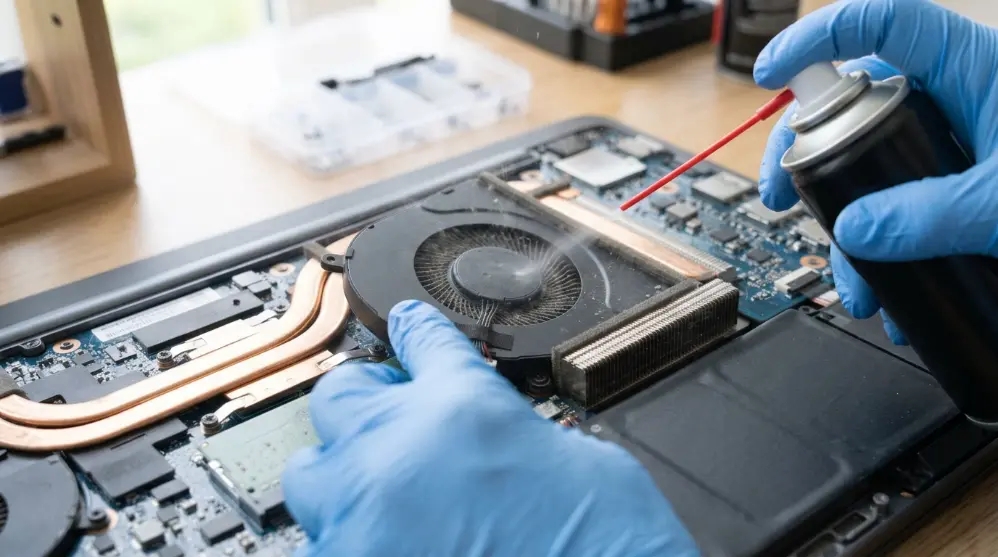
Now use electronics-safe compressed air to remove loose dust.
Follow these tips:
- Keep the can upright.
- Use short bursts of air.
- Hold the fan blades still.
- Blow dust away from the fan and surrounding parts.
- Avoid spraying liquid or moisture onto the motherboard.
Work slowly. There’s no need to use too much air.
Step 7: Clean the Fan Blades With a Soft Brush
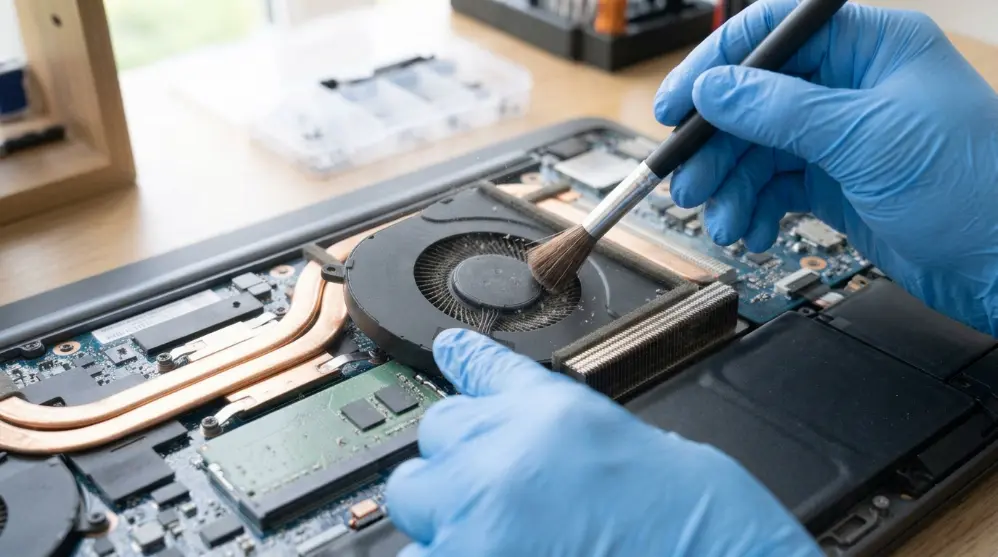
Sometimes dust sticks to the fan blades and doesn’t come off with air.
In this case, use a clean, dry, soft-bristle brush.
Gently move the brush over each blade to remove dust.
Don’t press hard or bend the blades. Also, avoid using a wet toothbrush.
Step 8: Clean the Heatsink Fins
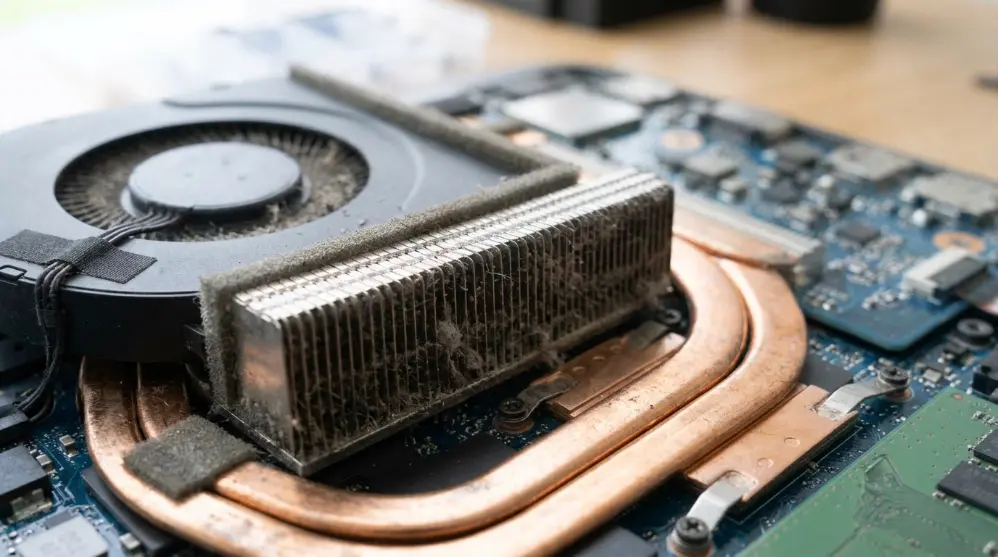
The heatsink is just as important as the fan.
It has many small metal fins that help release heat. Dust can collect between these fins and block airflow.
Use short bursts of compressed air to remove loose dust.
You can also use a soft brush to loosen dust carefully.
If you see a thick layer of dust blocking the fins, don’t push it deeper inside. The fan or heatsink may need to be removed for proper cleaning.
Step 9: Check for Remaining Dust
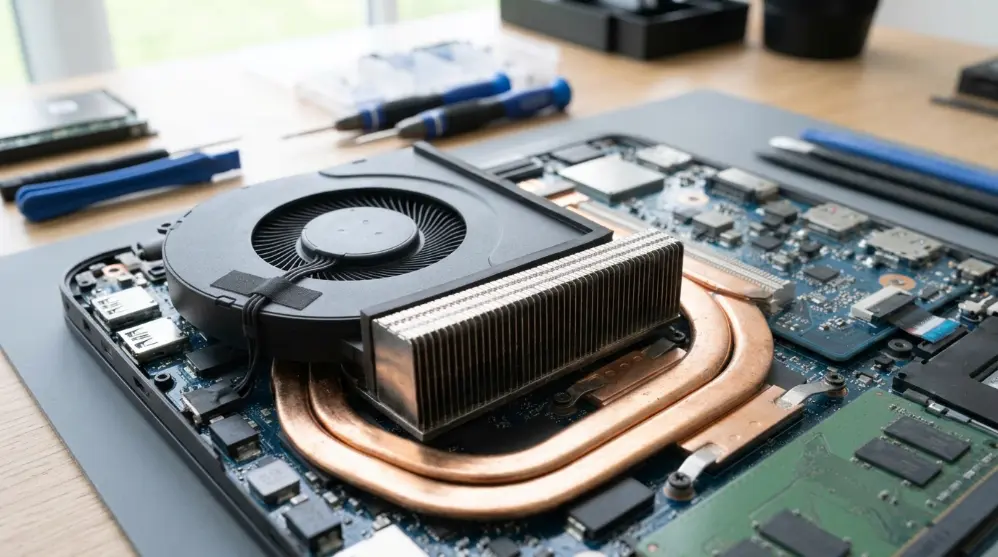
Take a close look at the fan and heatsink.
Check these areas:
- Fan blades.
- Space around the fan.
- Heatsink fins.
- Air intake openings.
- Exhaust vents.
Make sure no loose dust or brush pieces remain inside.
If everything looks clean, you’re ready to put your laptop back together.
How to Reassemble Your Laptop After Cleaning
You’ve finished cleaning the fan. Great job!
Now it’s time to put everything back in place.
Follow these steps:
Step 1: Reconnect the Battery
If you disconnected the internal battery, reconnect it carefully.
Make sure the connector is in its original position.
Don’t force it if it doesn’t fit easily.
Step 2: Put the Bottom Cover Back
Place the bottom cover over the laptop.
Check that all clips and edges line up correctly.
Press gently around the edges until the cover fits into place.
Step 3: Tighten the Screws
Use your screwdriver to put the screws back.
Don’t overtighten them because this can damage the screw holes.
Step 4: Turn On Your Laptop
Reconnect the charger and turn on your laptop.
Listen to the fan and check whether your laptop starts normally.
If you hear unusual noises or notice a burning smell, turn it off and get professional help.
How to Clean a Laptop Fan Without Compressed Air
Don’t have a compressed air can? That’s okay. You can still remove some dust using simple cleaning tools.
However, be careful. Not every cleaning method is safe for your laptop.
Here are a few options.
1. Use a Soft-Bristle Brush
A small, clean brush can help remove dust from fan blades and air vents.
Follow these steps:
- Turn off your laptop and unplug it.
- Open the back cover only if you’re comfortable doing so.
- Disconnect the internal battery according to the service guide.
- Hold the fan blades still.
- Gently brush away the dust.
Don’t use a hard brush because it can damage the fan blades.
2. Use a Microfiber Cloth
A microfiber cloth is useful for cleaning the outside of your laptop.
You can use it to wipe dust from:
- The laptop body.
- The keyboard area.
- The screen edges.
- The outside of the air vents.
Don’t push the cloth inside the vents.
3. Use an Electric Air Duster
An electric air duster is another option.
It blows air to remove dust from small spaces. Some models have adjustable airflow settings.
Choose a device made for electronics cleaning. Use a low setting, keep the fan blades still when cleaning internally, and follow the laptop manufacturer’s instructions.
Important: Never use a hair dryer or household vacuum cleaner directly on internal laptop parts. They can create heat, static electricity, or other risks.
Common Mistakes to Avoid When Cleaning a Laptop Fan
Cleaning your laptop fan isn’t difficult, but a few mistakes can cause problems.
Avoid these common mistakes:
1. Cleaning While the Laptop Is Running
Never clean the fan while your laptop is switched on.
Always shut it down and unplug the charger first.
2. Letting the Fan Spin Too Fast
Don’t spray strong air directly at the fan without holding the blades still.
A fast-spinning fan can damage its bearings or create unwanted electrical current.
3. Using Too Much Pressure
Don’t press hard on the fan blades or other internal parts.
Laptop parts are small and can break easily.
4. Using Water to Clean Internal Parts
Never pour water onto the fan or motherboard.
Water can damage electronic parts and cause short circuits.
Use a clean, dry brush for normal dust removal.
5. Opening the Laptop Without the Right Tools
Don’t use random knives or metal objects to open the bottom cover.
Use the correct screwdriver and a plastic opening tool.
6. Forgetting to Disconnect the Battery
When opening a laptop, follow its service guide for disconnecting the internal battery before working on internal parts.
This helps reduce the risk of electrical damage.
7. Ignoring the Heatsink
Cleaning only the fan may not solve an overheating problem.
Dust can also block the small metal fins near the fan.
Check both areas when performing an internal clean.
How Often Should You Clean Your Laptop Fan?
There’s no single cleaning schedule for every laptop.
It depends on how often you use your laptop and where you use it.
For example:
- Normal home use: Check the vents every few months.
- Daily use: Check for dust buildup more often.
- Dusty rooms: Clean the vents when you notice dust collecting.
- Gaming laptops: Check the cooling system regularly because gaming can produce more heat.
Lenovo suggests cleaning laptop fans every 3–6 months as a general maintenance guideline. However, always follow your laptop manufacturer’s instructions.
You don’t need to open your laptop every few months if there’s no dust buildup.
A quick check of the air vents can help you decide when cleaning is needed.
What to Do If Your Laptop Still Overheats After Cleaning
You’ve cleaned the fan, removed the dust, and put everything back together. But what if your laptop still gets hot?
Don’t worry. Dust isn’t the only reason a laptop can overheat.
Here are some other things you can check.
1. Check Whether the Fan Is Working
Turn on your laptop and listen carefully.
You should hear the fan running when the laptop needs cooling. Some laptops also have quiet fan modes, so the fan may not run all the time.
If the fan makes grinding noises, stops spinning, or doesn’t work when cooling is needed, it may be damaged.
2. Close Unnecessary Programs
Running too many programs can make your laptop work harder.
Close apps and browser tabs you don’t need. You can also open Task Manager on Windows by pressing Ctrl + Shift + Esc to check which programs are using the most CPU.
3. Keep Your Laptop on a Flat Surface

Don’t use your laptop on a bed, pillow, or blanket for long periods.
These soft surfaces can block the air vents.
Place your laptop on a hard, flat surface so air can move freely.
4. Check the Thermal Paste
Thermal paste helps transfer heat from the processor to the cooling system.
Over time, it may need to be replaced. However, this isn’t a job everyone should try at home.
If your laptop still overheats after proper cleaning, ask a repair technician to check the thermal paste.
5. Get Professional Help
If the fan isn’t working, the laptop shuts down unexpectedly, or you notice a burning smell, stop using it and contact a repair technician.
A damaged fan or blocked cooling system may need professional repair.
Tips to Keep Your Laptop Fan Clean
You don’t need to clean your laptop every week. A few simple habits can help prevent dust buildup.
- Keep your laptop away from dusty areas.
- Don’t block the air vents.
- Clean the outside vents regularly.
- Avoid eating near your laptop.
- Use your laptop on a clean, flat surface.
- Check for unusual fan noise.
- Follow the cleaning instructions from your laptop manufacturer.
These small steps can help your laptop’s cooling system work properly.
Keeping your laptop clean also includes taking care of its display. Check out our guide on how to clean a laptop screen to remove fingerprints, dust, and smudges without damaging it.
Laptop Fan Cleaning Tips for Different Brands
The basic cleaning process is similar for most laptops. However, the location of screws, fans, and air vents can differ between models.
Always check your laptop’s official service manual before opening it.
How to Clean a Dell Laptop Fan
Turn off your Dell laptop, unplug it, and locate its air vents.
For internal cleaning, check the Dell service manual for your exact model. Follow its instructions for removing the bottom cover and disconnecting the battery.
How to Clean an HP Laptop Fan
Start by turning off your HP laptop and unplugging the charger.
Use short bursts of compressed air to remove loose dust from the air vents. For deeper cleaning, follow the maintenance guide for your HP model.
How to Clean a Lenovo Laptop Fan
Lenovo laptops have different cooling designs depending on the model.
Check the Lenovo service manual before opening your laptop. If internal cleaning is needed, follow the model-specific instructions.
Frequently Asked Questions (FAQs)
Here are answers to some common questions about cleaning laptop fans.
1. How can I clean my laptop fan without opening it?
Turn off your laptop and unplug the charger. Find the air vents and use electronics-safe compressed air in short bursts to remove loose dust. This method may not remove dust stuck deep inside the fan.
2. Can I clean my laptop fan without compressed air?
Yes. You can use a small, soft-bristle brush to remove dust from accessible areas. For internal cleaning, open the laptop only if you’re comfortable doing so and follow the manufacturer’s repair instructions.
3. Is it safe to clean a laptop fan myself?
Yes, basic external cleaning is usually safe when done carefully. However, opening the laptop can be risky if you don’t know how to handle its internal parts. Ask a technician if you’re unsure.
4. Can dust make my laptop overheat?
Yes. Dust can block the fan and heatsink fins, reducing airflow. This can make your laptop hotter and affect its performance.
5. How do I know if my laptop fan needs cleaning?
Look for these signs:
- Loud fan noise.
- Excessive heat.
- Poor airflow.
- Dust around the air vents.
- Slow performance during heavy use.
These signs can also point to other problems, so cleaning may not always fix them.
6. Can I use a vacuum cleaner to clean my laptop fan?
Avoid using a standard household vacuum directly on internal laptop parts. It may create static electricity or damage delicate parts. Use electronics-safe cleaning tools instead.
7. How long does it take to clean a laptop fan?
A basic external clean may take around 5–10 minutes. Internal cleaning can take longer, depending on the laptop model and how much dust has built up.
8. Should I remove the laptop fan to clean it?
Not always. You can remove loose dust without taking the fan out. However, a badly blocked heatsink may need deeper cleaning. Follow your laptop’s service manual or ask a technician.
9. Can cleaning a laptop fan make it run faster?
Cleaning can improve airflow and help prevent overheating. If heat was causing your laptop to slow down, better cooling may help it perform normally again. However, cleaning doesn’t directly increase its processing speed.
10. When should I take my laptop to a repair shop?
Visit a repair shop if the fan makes grinding noises, doesn’t spin properly, or your laptop continues overheating after cleaning. A technician can check for damaged fans, blocked heatsinks, and other cooling problems.
Final Thoughts
Cleaning your laptop fan is a simple way to remove dust and help keep your computer cool.
For light dust, start with external cleaning using electronics-safe compressed air. If dust is stuck inside, a deeper clean may be needed.
Always turn off your laptop, unplug the charger, and follow the correct safety steps before touching internal parts.
Most importantly, don’t rush the process. If you’re not comfortable opening your laptop, let a repair technician handle it.
A little care can help keep your laptop clean, cool, and working properly.