
Starting a podcast is exciting, but poor audio can make people stop listening before they finish your first episode. Even if you have great ideas and interesting guests, a weak microphone can make your voice sound unclear, distant, or full of background noise.
The good news? You don’t need to spend hundreds of dollars to get clear, professional-sounding audio. There are plenty of excellent podcast microphones for beginners, home studios, and professional creators.
But with so many options available, choosing the right one isn’t always easy. Should you buy a USB microphone that connects directly to your computer? Or is an XLR microphone a better choice for long-term use?
In this guide, we’ll explore the best microphones for podcasting in 2026, including affordable options and professional models. We’ll compare their features, sound quality, connection types, advantages, and disadvantages to help you find the right microphone for your needs.
Whether you’re recording alone, interviewing guests, or building a professional podcast studio, there’s an option here worth considering.
Quick Picks: Best Podcast Microphones at a Glance
If you’re short on time, here’s a quick look at our top recommendations:
| Microphone | Best For |
|---|---|
| Shure MV7+ | Best overall |
| Shure SM7B | Professional podcasting |
| Fifine AmpliGame AM8 | Best budget option |
| Samson Q2U | Beginners and new podcasters |
| Audio-Technica AT2040USB | Best USB microphone |
We’ll also look at other microphones worth considering before making your final decision.
1. Shure MV7+: Best Overall Microphone for Podcasting
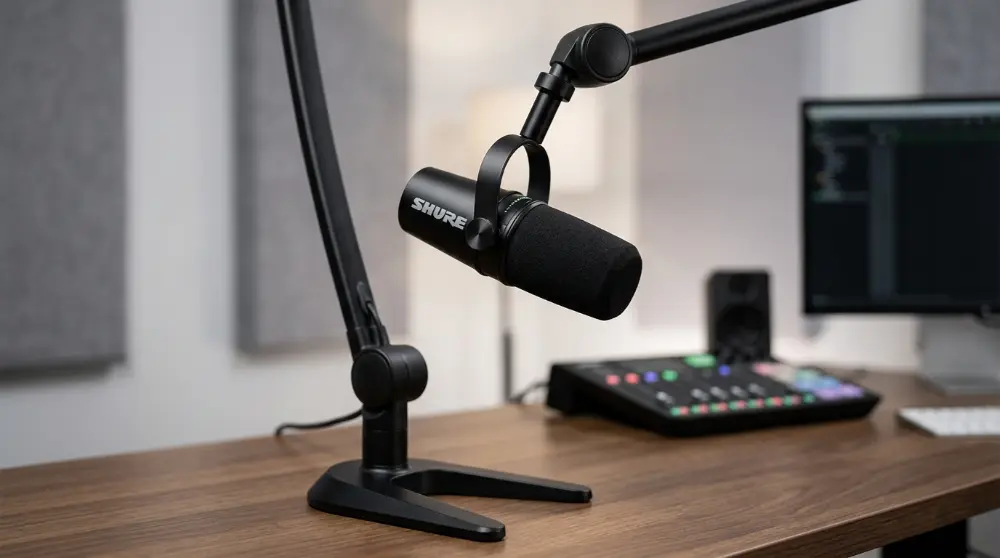
The Shure MV7+ is an excellent choice for podcasters who want professional sound without building a complicated recording setup. It combines simple USB-C connectivity with an XLR connection, giving you more freedom as your podcast grows.
You can connect it directly to your computer and start recording. Later, if you decide to build a more advanced studio, you can connect it to an audio interface using an XLR cable.
Another useful feature is its Auto Level Mode. It automatically adjusts microphone gain to help keep your voice at a more consistent level. It also includes a digital pop filter and real-time noise reduction features through Shure’s software.
Key Features
- Dynamic microphone with cardioid pickup pattern.
- USB-C and XLR connectivity.
- Automatic audio level adjustment.
- Digital pop filter.
- Real-time noise reduction.
- Customizable LED touch panel.
- Headphone output for audio monitoring.
Pros and Cons
Pros:
- Excellent voice recording quality.
- Works with both USB-C and XLR.
- Useful audio control features.
- Suitable for beginners and experienced podcasters.
Cons:
- More expensive than beginner microphones.
- Some advanced features require software.
- You’ll need additional equipment for XLR recording.
Best for: Solo podcasters, content creators, and professionals who want a microphone that can grow with their recording setup.
Our Take: If you want one microphone that offers simple connections today and more studio flexibility tomorrow, the Shure MV7+ is a strong place to start.
2. Shure SM7B: Best Professional Microphone for Podcasting
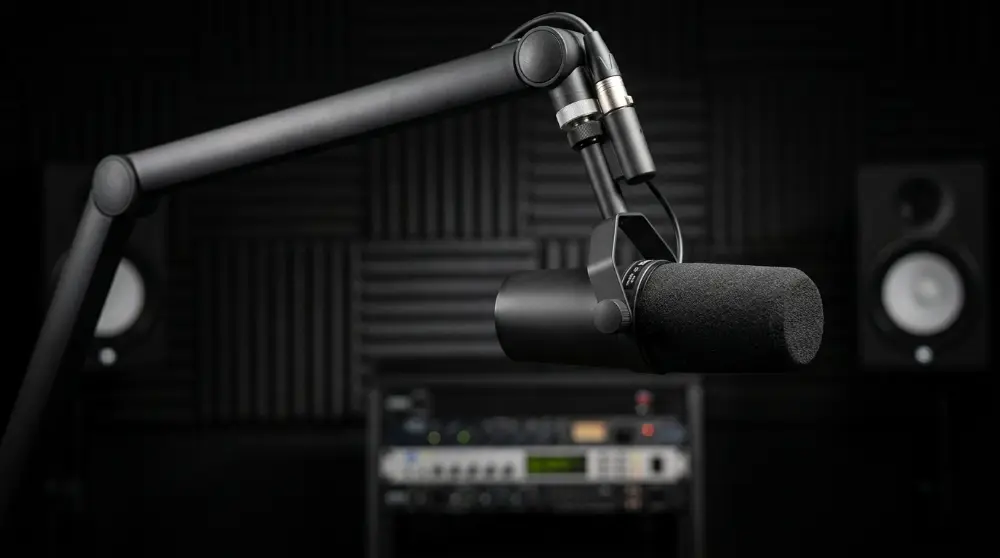
If you’ve watched professional podcast interviews, you may have seen the Shure SM7B. It’s a popular microphone known for its rich voice sound and ability to reduce unwanted background noise.
This microphone is built for serious recording. Its dynamic design and cardioid pickup pattern help focus on the person speaking in front of it instead of picking up sounds from every direction.
The SM7B is especially useful in home studios where complete soundproofing isn’t possible. It can help reduce unwanted room sounds, although it won’t remove every noise. Good microphone placement and a quiet recording space still matter.
One thing to remember is that the SM7B uses an XLR connection. You can’t plug it directly into your computer with a standard USB cable. You’ll need an audio interface or mixer to use it.
It also needs plenty of clean gain. Some basic audio interfaces may struggle to provide enough volume without adding unwanted noise.
Key Features
- Professional dynamic microphone.
- XLR connection.
- Cardioid pickup pattern.
- Built-in air suspension shock isolation.
- Internal pop filter.
- Switchable bass roll-off and presence boost.
- Designed for close-up voice recording.
Pros and Cons
Pros:
- Rich and smooth voice reproduction.
- Helps reject unwanted background sounds.
- Strong build quality.
- Excellent for professional podcast studios.
Cons:
- More expensive than beginner microphones.
- Requires an audio interface or mixer.
- May need an additional gain booster.
- Not a plug-and-play microphone.
Best for: Professional podcasters, radio hosts, interview shows, and creators who already have recording equipment.
Our Take: The Shure SM7B is a great choice if audio quality is your main priority and you have the budget for the extra equipment. However, beginners may get better value from a USB/XLR microphone.
3. Fifine AmpliGame AM8: Best Budget Microphone for Podcasting
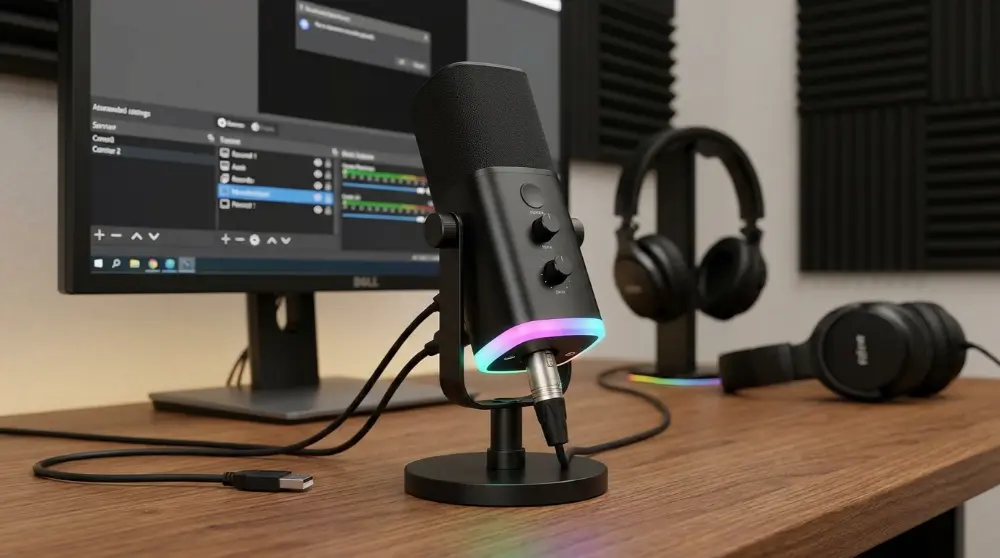
You don’t need an expensive microphone to start a podcast. The Fifine AmpliGame AM8 is a budget-friendly option that gives beginners useful features without making the setup difficult.
It offers both USB-C and XLR connections. This means you can connect it directly to your computer through USB or use an audio interface with an XLR cable.
The dynamic capsule and cardioid pickup pattern make it suitable for voice recording. It can also help reduce some background noise when you speak close to the microphone.
Another handy feature is the tap-to-mute button. If you need to cough, sneeze, or speak to someone outside your recording, you can quickly mute your microphone.
The microphone also includes RGB lighting, which makes it a nice addition to a gaming desk or video podcast setup.
Key Features
- Dynamic cardioid microphone.
- USB-C and XLR connections.
- Tap-to-mute control.
- RGB lighting.
- Headphone monitoring.
- Adjustable microphone controls.
Pros and Cons
Pros:
- Affordable for beginners.
- Offers USB and XLR connections.
- Easy to set up using USB.
- Convenient mute button.
- Attractive design for streaming setups.
Cons:
- RGB lighting may not appeal to everyone.
- Build and sound quality aren’t on the same level as premium models.
- Some accessories may need to be purchased separately.
Best for: New podcasters, gamers, streamers, and people who want an affordable microphone for everyday voice recording.
Our Take: The Fifine AM8 is worth considering if you’re working with a small budget. It gives you room to learn podcast recording without spending too much money on your first microphone.
4. Samson Q2U: Best Microphone for Podcasting Beginners
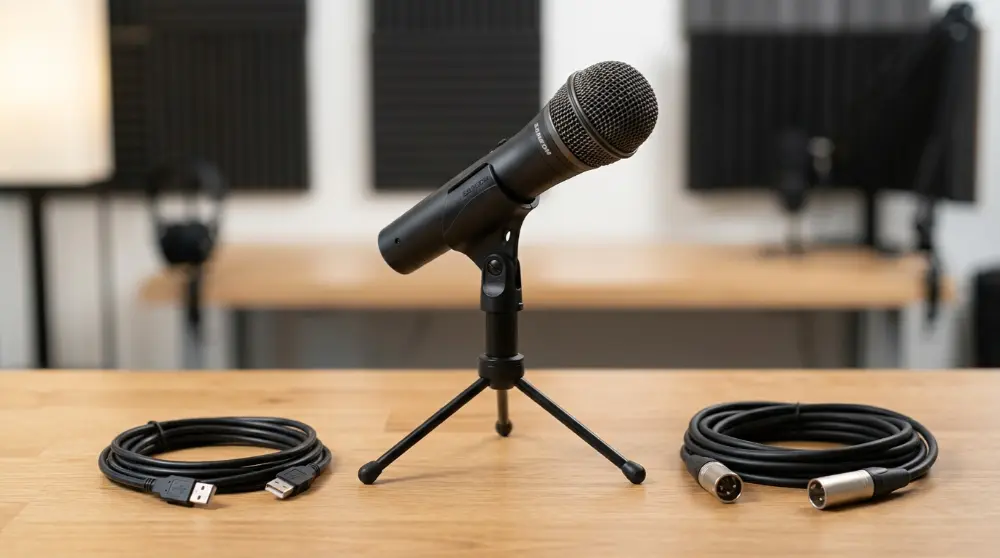
The Samson Q2U is one of the most beginner-friendly microphones for podcasting. It’s affordable, easy to use, and offers both USB and XLR connections.
For someone starting a podcast at home, this microphone covers the basics without requiring a complicated setup.
You can connect it to your laptop using USB and record with free software such as Audacity. You don’t need to purchase an audio interface or mixer for a basic recording setup.
As your podcast grows, you can switch to the XLR connection and use a separate audio interface.
The Q2U uses a dynamic microphone capsule with a cardioid pickup pattern. This makes it a practical choice for people recording in normal rooms where some background noise may be present.
Key Features
- Dynamic microphone.
- USB and XLR connections.
- Cardioid pickup pattern.
- Headphone output.
- Onboard volume controls.
- Compatible with common recording software.
Pros and Cons
Pros:
- Great starting point for new podcasters.
- Easy USB setup.
- Supports XLR recording.
- Doesn’t require an expensive audio interface.
- Good value for the price.
Cons:
- Basic design.
- Not as feature-rich as premium microphones.
- May require close microphone placement.
- Availability can vary by location.
Best for: Students, beginners, solo podcast hosts, and anyone starting a podcast on a limited budget.
Our Take: If this is your first podcast microphone, the Samson Q2U is an easy recommendation. Its dual connection options also mean you won’t need to replace it immediately when you upgrade your recording setup.
5. Audio-Technica AT2040USB: Best USB Microphone for Podcasting
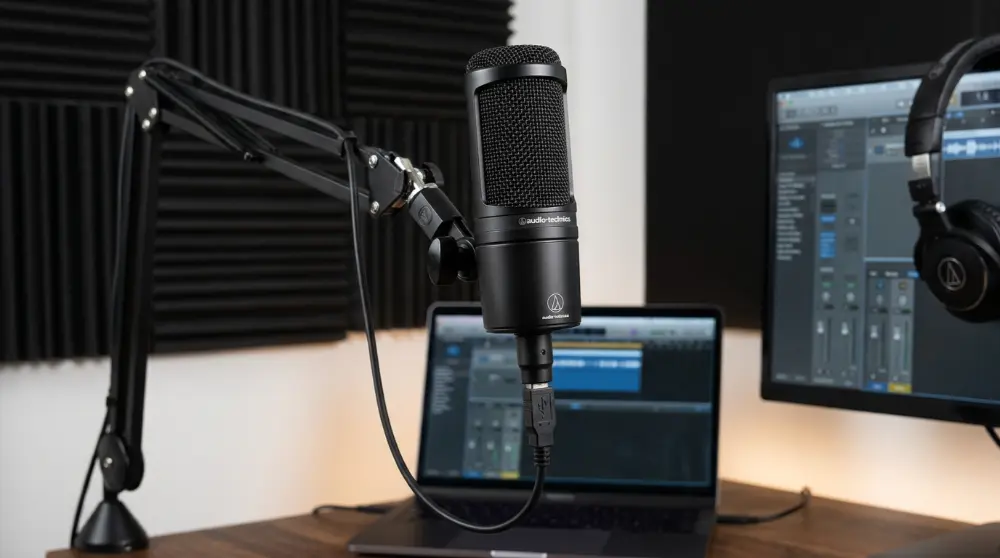
If you want professional-style voice quality without dealing with an audio interface, the Audio-Technica AT2040USB is worth a look.
This microphone combines a dynamic design with USB-C connectivity. You can connect it directly to your computer and start recording without buying a separate mixer.
One of its biggest advantages is its built-in headphone output. You can listen to your voice while recording and catch problems before they become part of your final episode.
The microphone also uses a hypercardioid pickup pattern. This means it focuses more tightly on sound coming from the front while helping reduce unwanted sounds from other directions.
Its design is especially useful for people recording podcasts in home offices, bedrooms, and small studios.
Key Features
- Dynamic microphone capsule.
- USB-C digital connection.
- Hypercardioid pickup pattern.
- Built-in headphone output.
- Zero-latency monitoring.
- Mix control for balancing microphone and computer audio.
- Built-in pop protection.
Pros and Cons
Pros:
- Simple USB plug-and-play setup.
- Professional-style broadcast sound.
- Useful headphone monitoring.
- Helps reduce unwanted room noise.
- No separate audio interface required.
Cons:
- Doesn’t offer an XLR connection.
- Requires close microphone placement.
- Fewer upgrade options than hybrid microphones.
Best for: Solo podcasters, online presenters, and creators who want a simple USB recording setup.
Our Take: The AT2040USB is a solid option if you don’t want to deal with extra audio equipment. It’s especially useful when you want a clean desk setup and straightforward recording controls.
6. RØDE PodMic: Best XLR Microphone for Home Studios

The RØDE PodMic is designed for people who want broadcast-style audio without spending a fortune on professional studio equipment.
It’s a dynamic XLR microphone with a cardioid pickup pattern. Its main job is simple: capture your voice clearly while helping reduce unwanted sounds around you.
The metal body gives it a strong and professional look. It also has an internal pop filter that helps reduce harsh sounds caused by letters such as P and B.
Unlike USB microphones, the PodMic needs an audio interface, mixer, or compatible recording device. This adds an extra cost, but it also gives you more control over your recording setup.
For example, if you plan to record a podcast with two or more people in the same room, you can connect multiple PodMic microphones to an audio interface with enough inputs.
Key Features
- Dynamic microphone.
- XLR connection.
- Cardioid pickup pattern.
- Internal pop filter.
- Internal shock mounting.
- Solid metal construction.
- Designed for spoken-word recording.
Pros and Cons
Pros:
- Clear and full voice sound.
- Strong and durable body.
- Good for home podcast studios.
- Built-in pop protection.
- Professional appearance.
Cons:
- Requires an audio interface or mixer.
- Not suitable for direct USB connection.
- A boom arm or microphone stand is usually needed.
- Less flexible than USB/XLR hybrid models.
Best for: Home studio owners, interview hosts, and podcasters who already have an audio interface.
Our Take: The RØDE PodMic is a practical choice if you’re building a more serious podcast setup. It offers a good balance of sound quality, build quality, and price.
7. Blue Yeti: Best USB Condenser Microphone for Podcasting

The Blue Yeti is one of the best-known USB microphones for podcasting, streaming, and online recording. Its simple design and multiple pickup patterns make it useful for different recording situations.
Unlike most microphones in this list, the Blue Yeti uses a condenser capsule. This allows it to capture detailed sound, but it can also pick up more room noise.
That’s something to consider if you record in a noisy bedroom or office.
One of its biggest advantages is its four pickup patterns:
- Cardioid: Best for recording one person speaking in front of the microphone.
- Omnidirectional: Captures sound from all directions.
- Bidirectional: Records sound from the front and back.
- Stereo: Captures sound across two channels for a wider audio image.
These options make the Blue Yeti flexible. For example, you can use cardioid mode for a solo podcast and bidirectional mode for a face-to-face interview.
It connects directly to your computer through USB, so you don’t need an external audio interface.
Key Features
- USB condenser microphone.
- Four pickup patterns.
- Built-in gain control.
- Headphone output.
- Mute button.
- Adjustable desktop stand.
- Plug-and-play operation.
Pros and Cons
Pros:
- Easy to set up.
- Multiple recording patterns.
- Detailed voice recording.
- No separate audio interface needed.
- Useful for podcasting and streaming.
Cons:
- Can pick up keyboard and background noise.
- Larger than many modern USB microphones.
- Needs careful placement in untreated rooms.
- Not as suitable for noisy spaces as a dynamic microphone.
Best for: Podcasters recording in quiet rooms, streamers, online teachers, and creators who want multiple pickup patterns.
Our Take: The Blue Yeti is still worth considering if you record in a quiet space and want flexibility. However, if your room has noticeable echo or background noise, a dynamic microphone may be a better choice.
8. Sennheiser Profile: Best Compact USB Microphone for Podcasting

If you want a microphone that looks good, sounds clear, and doesn’t take up much desk space, the Sennheiser Profile is worth considering.
It’s a USB condenser microphone designed for podcasting, streaming, and voice recording. You can connect it directly to your computer without buying an external audio interface.
One thing that makes this microphone easy to use is its onboard controls. You can adjust the microphone gain, headphone volume, and mix settings without opening complicated software.
It also has a mute button, which comes in handy during live streams, online meetings, and podcast recordings.
The Sennheiser Profile is a good option for creators who want more control than a basic USB microphone offers but don’t need a full studio setup.
Key Features
- USB condenser microphone.
- Cardioid pickup pattern.
- Built-in gain control.
- Headphone volume adjustment.
- Mix control.
- Touch-sensitive mute button.
- Available with a desktop stand or streaming set.
Pros and Cons
Pros:
- Simple USB connection.
- Easy-to-use physical controls.
- Compact design.
- Clear voice recording.
- No external audio interface required.
Cons:
- Condenser design can pick up room noise.
- No XLR connection.
- Not ideal for echo-filled rooms.
- May need careful placement for the best results.
Best for: Streamers, solo podcasters, online teachers, and creators who prefer a compact desktop microphone.
Our Take: The Sennheiser Profile is a good choice if you want a clean and simple recording setup. Its physical controls make everyday recording easier, especially if you regularly switch between talking, streaming, and online meetings.
9. PreSonus Revelator Dynamic: Best Microphone for Noisy Rooms

Recording in a bedroom or home office isn’t always easy. You might hear computer fans, traffic, people talking, or other sounds in the background.
The PreSonus Revelator Dynamic is designed to help creators deal with some of these recording problems.
It’s a dynamic USB microphone with built-in audio processing features. You can connect it directly to your computer and use its software controls to adjust your voice sound.
Its dynamic capsule is useful for spoken-word recording, especially when you keep the microphone close to your mouth.
The microphone also works with PreSonus software, giving you access to audio effects and processing tools. These can help shape your voice without requiring several separate pieces of equipment.
However, remember that no microphone can completely remove background noise. Your recording space and microphone placement still make a big difference.
Key Features
- Dynamic microphone capsule.
- USB connection.
- Built-in audio processing.
- Cardioid pickup pattern.
- Software-based sound controls.
- Headphone monitoring.
- Designed for podcasting and streaming.
Pros and Cons
Pros:
- Useful for home recording.
- Dynamic design helps limit room noise.
- Built-in audio processing options.
- Direct USB connection.
- Good for streaming and spoken-word content.
Cons:
- More expensive than basic USB microphones.
- USB-only connection.
- Some features require software.
- May take time to understand the available controls.
Best for: Home podcasters, streamers, and creators who record in rooms that aren’t professionally treated.
Our Take: The PreSonus Revelator Dynamic is worth considering if you want built-in audio tools and a microphone designed for spoken-word recording. Still, don’t expect software to fix every problem in a noisy room.
10. RØDE Wireless Micro: Best Wireless Microphone for Video Podcasting
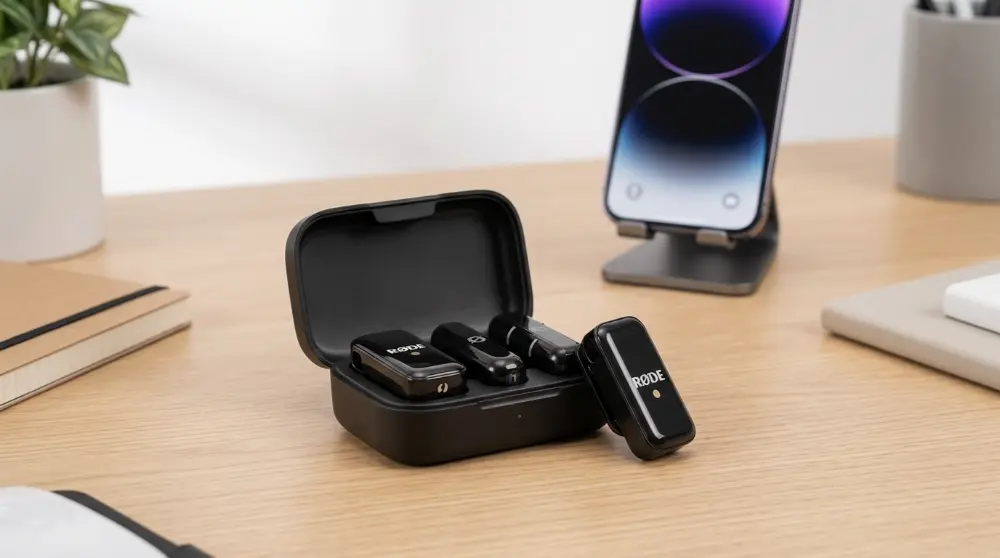
Not every podcast is recorded in front of a desk. Some creators interview guests in different locations, record outdoor conversations, or produce video podcasts using smartphones.
That’s where the RØDE Wireless Micro can help.
Unlike traditional podcast microphones, this is a wireless microphone system. It includes small clip-on transmitters that attach to your clothing and send audio to a receiver connected to your phone.
This setup gives you more freedom to move around while recording. You don’t need to sit close to a desktop microphone or deal with long audio cables.
It’s especially useful when recording two people. You can attach one transmitter to yourself and another to your guest, allowing both voices to be captured separately.
The compact design also makes it easy to carry when recording interviews outside your home or studio.
Key Features
- Wireless microphone system.
- Two compact clip-on transmitters.
- Smartphone receiver options.
- Built-in microphones.
- Automatic audio level management.
- Compact charging case.
- Designed for mobile video recording.
Pros and Cons
Pros:
- Small and portable design.
- Useful for two-person interviews.
- No long microphone cables.
- Easy to use with compatible smartphones.
- Great for outdoor video podcasts.
Cons:
- Not designed like a traditional studio microphone.
- Wireless recording depends on battery life.
- Clothing movement can create unwanted noise.
- Smartphone compatibility depends on the receiver version.
Best for: Video podcasters, mobile interviewers, vloggers, and creators who record conversations away from a studio.
Our Take: If you record video podcasts or interviews using your smartphone, the RØDE Wireless Micro is a useful option. However, if you mainly record long audio-only episodes at a desk, a traditional dynamic microphone may be a better investment.
How to Choose the Best Microphone for Podcasting
Picking a podcast microphone isn’t just about buying the most expensive model. The right choice depends on your room, recording style, budget, and experience. A $100 microphone can work very well if it suits your setup.
Before you buy one, think about these important points.
1. USB vs. XLR: Which Connection Is Better?
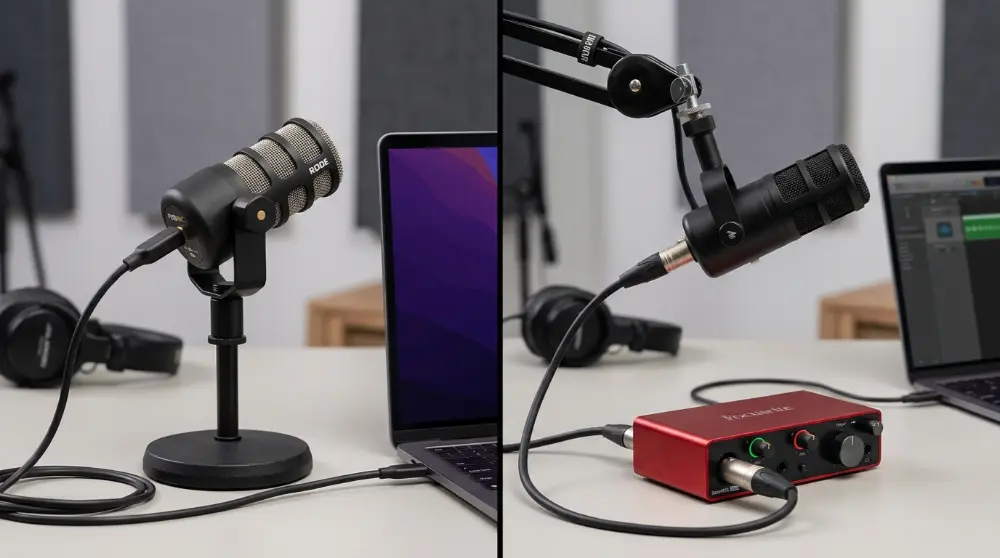
One of the first decisions you’ll make is choosing between a USB and an XLR microphone. Both can deliver good podcast audio, but they work in different ways.
USB microphones
A USB microphone connects directly to your computer. You don’t need a separate audio interface to start recording.
This makes USB models a good choice for beginners. They’re also useful if you record alone and want a simple setup.
Benefits of USB microphones include:
- Easy connection to a computer.
- No separate audio interface required.
- Simple setup for solo podcasts.
- Often include headphone monitoring and volume controls.
- Usually cost less to set up.
The main drawback is flexibility. Many USB microphones don’t offer an XLR connection, so you may need to replace the microphone if you later want a more advanced recording system.
XLR microphones
An XLR microphone connects to an audio interface or mixer. That device then connects to your computer.
This setup takes a little more work, but it gives you more control over your recording equipment. It’s also useful when you have multiple hosts or guests.
Benefits of XLR microphones include:
- More flexibility when building a studio.
- Easy connection to professional audio equipment.
- Better options for multi-person recording setups.
- Ability to upgrade your interface or mixer separately.
However, remember that an XLR microphone usually needs extra equipment. You’ll need to include the cost of an audio interface, XLR cable, and possibly a microphone stand.
Which one should you choose?
If you’re starting your first podcast, a USB microphone is often the easiest option. If you plan to build a studio or record several people, an XLR microphone may be a better long-term choice.
A hybrid microphone, such as the Shure MV7+, gives you both USB and XLR connections. That’s a useful option if you want a simple setup today and more flexibility later.
2. Dynamic vs. Condenser: Which Mic Should You Get?
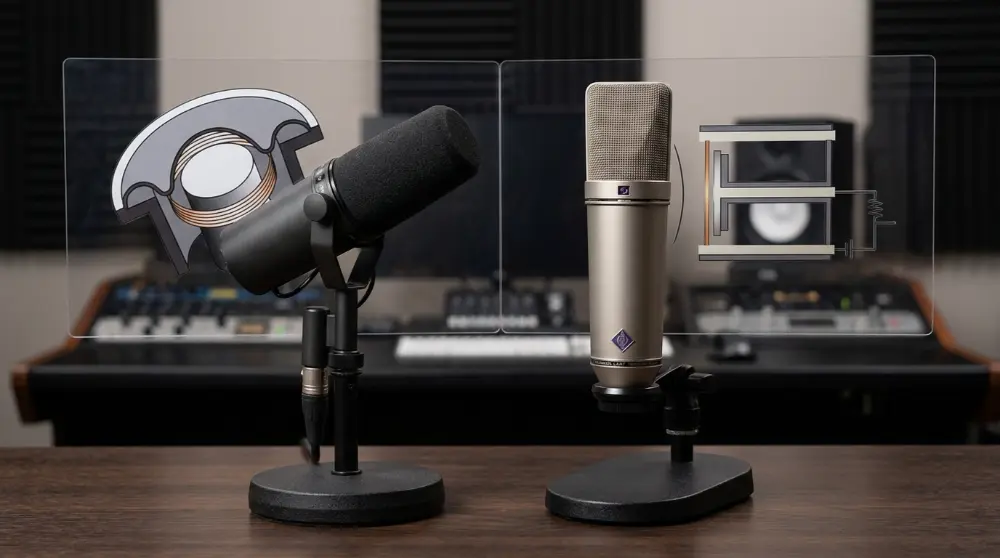
Microphones use different designs to capture sound. Two common types are dynamic and condenser.
Dynamic microphones
Dynamic microphones are a popular choice for podcasting, especially when recording at home.
They’re generally less sensitive to distant sounds than condenser microphones. This can make them easier to use in rooms with some background noise or echo.
Benefits include:
- Good for close-up voice recording.
- Often work well in ordinary home rooms.
- Usually durable and easy to handle.
- Suitable for interviews and spoken content.
The Shure MV7+, Shure SM7B, Samson Q2U, and RØDE PodMic are examples of dynamic microphones.
Condenser microphones
Condenser microphones are more sensitive and can capture fine details in your voice. They’re a good option when you have a quiet recording space.
However, that extra sensitivity can also pick up unwanted sounds, such as keyboard clicks, fans, traffic, and room echo.
Benefits include:
- Detailed voice recording.
- Good for quiet, treated rooms.
- Useful for podcasts, voice-overs, and music.
- Available in many USB models.
The Blue Yeti and Sennheiser Profile are examples of USB condenser microphones.
Which type is best for podcasting?
If you record in a bedroom or home office, a dynamic microphone is often a practical starting point. If you have a quiet room with good sound treatment, a condenser microphone may suit your needs.
Neither type removes background noise completely. Your room and microphone position still matter.
3. Check the Microphone’s Polar Pattern
A polar pattern describes the direction from which a microphone picks up sound. This matters because you don’t always want it to capture everything happening around you.
Here are the main patterns you’ll see when shopping for a podcast microphone.
Cardioid microphones mainly pick up sound from the front. They reduce sound coming from the sides and rear.
This pattern is a great choice for solo podcasts because it focuses on the person speaking into the microphone.
An omnidirectional microphone picks up sound from all directions. It can work well when you want to capture several people or the natural sound of a room.
However, it may also capture more unwanted noise.
A bidirectional microphone picks up sound from the front and back while reducing sound from the sides.
It’s useful for certain face-to-face interviews where two people sit opposite each other.
Which polar pattern should you choose?
For most solo podcasters, cardioid is the easiest choice. If you regularly record interviews with people sitting around one microphone, a microphone with multiple pickup patterns may offer more flexibility.
4. Set a Realistic Budget
You don’t need to spend hundreds of dollars to start a podcast. The key is to consider the full setup, not just the microphone price.
| Budget range | What to expect |
|---|---|
| Under $50 | Basic USB options and entry-level microphones |
| $50–$100 | Better beginner options, including some USB/XLR models |
| $100–$200 | More features, stronger build quality, and advanced USB choices |
| $200–$400 | Premium microphones and hybrid options |
| Over $400 | Professional studio microphones and more specialized equipment |
These are general spending ranges, not fixed market prices. Actual prices vary by country, seller, and model.
If you’re buying an XLR microphone, remember to budget for an audio interface, cable, and stand. A microphone that looks affordable on its own can cost much more once you add everything you need.
Quick tip: Don’t spend your entire budget on the microphone. Keep some money for headphones, a stable stand, and a pop filter. Those small items can make recording much easier.
Essential Podcast Microphone Accessories
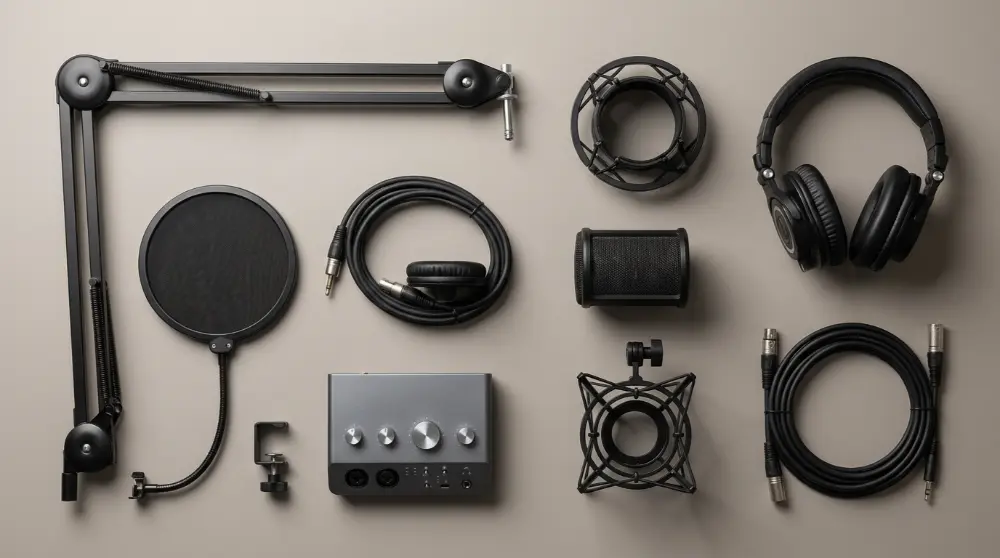
A good microphone is important, but it’s only one part of your recording setup. The right accessories can make recording easier, improve microphone placement, and help you get cleaner audio.
You don’t need to buy every accessory at once. Start with the items that solve problems in your recording space.
1. Boom Arm or Microphone Stand
A microphone stand keeps your microphone in a stable position while you speak. It also helps you maintain a consistent distance from the mic.
You can choose between two common options:
- Desk stand: A simple and affordable option for beginners. It sits directly on your desk.
- Boom arm: Attaches to your desk and lets you move the microphone closer to your mouth.
A boom arm is especially useful if you record for long periods. You can adjust its position without moving your entire setup.
If your desk picks up vibrations from typing or movement, look for a stand with good vibration control.
2. Pop Filter or Windscreen
Have you ever noticed a loud popping sound when someone says words like “Peter” or “Podcast”?
These sounds are called plosives. They happen when bursts of air hit the microphone.
A pop filter or foam windscreen helps reduce these unwanted sounds.
- Pop filter: Usually sits between your mouth and the microphone.
- Foam windscreen: Fits over the microphone and helps reduce wind and breath noise.
Both can be useful for podcasting. Some microphones already include built-in pop protection, but an extra filter may still help.
3. Closed-Back Headphones
Headphones let you hear your voice while recording. They also help you notice problems that might go unnoticed when using computer speakers.
For podcasting, closed-back headphones are a practical choice because they reduce sound leaking into the microphone.
Look for headphones with:
- Comfortable ear cushions.
- Clear voice reproduction.
- A secure fit.
- A detachable or durable cable.
You don’t need expensive studio headphones to start. A reliable pair that lets you hear your recording clearly is enough.
4. Audio Interface
An audio interface connects an XLR microphone to your computer. It converts the microphone’s signal into digital audio that recording software can use.
Most basic interfaces include:
- XLR microphone inputs.
- Gain controls.
- Headphone outputs.
- USB connections.
- Phantom power for microphones that require it.
Dynamic microphones such as the Shure SM7B may need a good amount of clean gain. Some interfaces can provide enough, while others may benefit from an inline booster.
If you’re using a USB microphone, you usually don’t need a separate audio interface.
5. Shock Mount
A shock mount holds your microphone and helps reduce vibrations from your desk or stand.
For example, if you accidentally hit the desk while recording, that movement can create a low thumping sound. A shock mount can help reduce some of these noises.
Not every microphone needs a separate shock mount. Some models already include internal vibration protection or have compatible mounts available.
6. Acoustic Treatment
Room acoustics can make a big difference to podcast audio.
You might buy a premium microphone, but your recordings can still sound poor if your room has too much echo.
Here are a few simple ways to improve your recording space:
- Record in a quiet room.
- Close windows and doors.
- Use thick curtains to reduce reflections.
- Add a rug if you have hard flooring.
- Place bookshelves or soft furniture around the room.
- Avoid recording near loud fans or air conditioners.
You don’t need to cover every wall with expensive acoustic foam. Even a few practical changes can make your room sound better.
How to Set Up a Podcast Microphone Correctly

Buying a good microphone is only the first step. You also need to position and configure it correctly.
A poor setup can make even an expensive microphone sound disappointing. Follow these steps to get started.
Step 1: Choose a Quiet Recording Space
Find a room where you won’t hear much traffic, people talking, or other background sounds.
Turn off anything noisy that you don’t need while recording. If possible, choose a room with curtains, furniture, and carpets instead of lots of empty hard surfaces.
Step 2: Position the Microphone Near Your Mouth
For most dynamic podcast microphones, start with the microphone around 4 to 6 inches from your mouth.
Keep it slightly off to one side rather than pointing directly at your lips. This can help reduce plosive sounds.
The exact distance depends on your microphone and speaking style. Try a few positions and listen to the results.
Step 3: Adjust the Microphone Gain
Gain controls how strongly your microphone signal is amplified.
If the gain is too low, your voice may sound quiet. If it’s too high, loud words can become distorted.
Start with a low setting and speak at your normal recording volume. Increase the gain until your voice is clear without clipping.
Step 4: Connect Your Headphones
Plug your headphones into the microphone or audio interface if it supports monitoring.
Listen while speaking. Check for background noise, distortion, echo, and unwanted breathing sounds.
If your microphone offers zero-latency monitoring, use it to hear your voice without noticeable delay.
Step 5: Record a Short Test
Before recording a full episode, make a short test recording.
Speak at your normal volume. Try a few louder sentences and quieter ones too.
Play the recording back and check:
- Is your voice clear?
- Is there too much background noise?
- Can you hear popping sounds?
- Does your voice sound distorted?
- Is the volume consistent?
Make small adjustments until the recording sounds right.
Best Podcast Recording Software to Use With Your Microphone
Your microphone captures your voice, but recording software helps you turn that audio into a complete podcast episode.
You can use free or paid software depending on your needs. Some programs are simple enough for beginners, while others offer advanced editing tools.
Here are some popular options worth considering.
1. Audacity
Audacity is a free audio recording and editing program. It works well for beginners who want to record voice, remove unwanted sections, and make basic audio adjustments.
Best for: Beginners and solo podcasters.
2. Adobe Audition
Adobe Audition offers advanced recording, editing, and audio cleanup tools. It’s useful when you want more control over your podcast production.
Best for: Experienced podcasters and professional audio editing.
3. GarageBand
GarageBand is a beginner-friendly recording program for Apple devices. You can record your voice, edit audio, and add music or sound effects.
Best for: Mac users who want a simple recording setup.
4. Riverside
Riverside is designed for remote interviews and podcast recording. It records participants separately, which can make editing easier.
Best for: Remote interviews and video podcasts.
5. OBS Studio
OBS Studio is a free tool for recording video and live streaming. It also includes audio controls, making it useful for video podcasters.
Best for: Video podcasts, live shows, and streaming.
Which software should you choose?
If you’re just starting, Audacity is a good free option for audio-only podcasts. Choose Riverside if you often interview guests online. For video podcasts and live shows, OBS Studio is worth considering.
Your microphone and recording software should work together. Before recording a full episode, check that your software recognizes the correct microphone and input level.
Common Podcast Microphone Mistakes to Avoid
Even a great microphone won’t guarantee good audio if you use it incorrectly. Small mistakes can make your voice sound unclear or unprofessional.
Here are some common problems to watch out for.
1. Buying a Microphone Without Considering Your Room
A sensitive condenser microphone may sound great in a quiet studio, but it can pick up unwanted sounds in a noisy bedroom.
Before buying, think about where you’ll record. If your room has background noise or echo, a dynamic microphone may be a more practical choice.
2. Speaking Too Far Away From the Microphone
When you sit too far from the microphone, your voice may sound weak and distant. You might also capture more room noise.
Try to maintain a steady distance while speaking. For many dynamic microphones, around 4 to 6 inches is a useful starting point.
3. Setting the Gain Too High
High gain doesn’t automatically mean better sound.
If you increase the gain too much, your recording may pick up fans, keyboard clicks, and other unwanted sounds. Loud words can also become distorted.
Start with a lower setting and adjust it while testing your voice.
4. Ignoring Background Noise
A microphone can capture sounds you don’t notice while sitting in your room.
Air conditioners, computer fans, traffic, and nearby conversations can all affect your recording.
Close doors and windows, turn off unnecessary equipment, and choose a quiet time to record.
5. Skipping Headphone Monitoring
Recording without headphones makes it harder to notice audio problems.
You might not realize that your microphone is too quiet, your cable is loose, or your voice is distorted until you finish the episode.
Use headphones to check your sound before and during recording.
6. Spending Too Much on Your First Microphone
It’s tempting to buy an expensive professional microphone when starting a podcast. But you may not need one.
A beginner-friendly model such as the Samson Q2U or Fifine AM8 can provide a practical starting point. You can upgrade when your recording needs change.
7. Forgetting to Test Before Recording
Don’t wait until you’ve finished a 40-minute episode to discover a problem.
Record a short test first. Listen to it, adjust your setup, and make sure everything works.
A few minutes of testing can save you a lot of editing time later.
Best Podcast Microphones for Different Recording Needs
Not every podcaster needs the same type of microphone. A solo creator recording at home has different needs from someone hosting interviews or running a professional studio.
If you’re still unsure which model to buy, start by thinking about how you’ll use it.
Best Microphone for Solo Podcasting
The Shure MV7+ is a strong choice for solo podcasters. It offers USB-C and XLR connections, along with useful digital audio features.
You can start with USB and move to an XLR setup later. Its close-up recording design also makes it a practical option for home studios.
Why choose it? You want a flexible microphone with room to grow.
Best Microphone for Two-Person Interviews
The Samson Q2U is an affordable choice for interview setups. You can connect two microphones to a suitable audio interface or mixer and give each person their own microphone.
Remember, you’ll need two microphones and enough separate inputs to record both speakers properly.
Why choose it? You want an affordable way to start recording interviews.
Best Microphone for Professional Studios
The Shure SM7B is a popular broadcast-style microphone. It offers a familiar close-up sound and a sturdy design for regular studio use.
It needs an XLR connection and a suitable preamp or audio interface. Its cost can also be high for someone just starting out.
Why choose it? You have a proper recording setup and want a professional XLR microphone.
Best Microphone for Video Podcasts and Streaming
The Blue Yeti is a convenient USB microphone for video creators, streamers, and podcasters. Its multiple pickup patterns offer different recording options.
You can use cardioid mode for solo recording or other patterns when your setup requires them. Just remember that its condenser design can pick up more room noise.
Why choose it? You want a flexible USB microphone for different types of content.
Best Microphone for Mobile Podcasting
The RØDE Wireless Micro is designed for mobile recording. Its small wireless transmitters clip onto clothing, making it useful for video interviews and podcasts recorded away from a desk.
It’s not a replacement for a traditional studio microphone in every situation, but it offers more freedom when recording on the move.
Why choose it? You record video podcasts, outdoor interviews, or mobile content.
Frequently Asked Questions About Podcast Microphones
Here are answers to common questions people ask before buying a podcast microphone.
1. What is the best microphone for podcasting in 2026?
The Shure MV7+ is a strong all-around choice for many podcasters because it offers USB-C and XLR connections. However, the best option depends on your budget and recording setup.
The Samson Q2U is a good beginner option, while the Shure SM7B suits more advanced studio setups.
2. What type of microphone is best for podcasting?
Dynamic microphones are often a practical choice for podcasting, especially in ordinary home rooms. They’re designed for close-up voice recording and are generally less sensitive to distant sounds than condenser microphones.
Condenser microphones can also work very well in quiet, treated rooms.
3. Is a USB or XLR microphone better for podcasting?
USB microphones are easier to set up because they connect directly to your computer. XLR microphones need an audio interface or mixer but offer more flexibility for advanced recording setups.
Choose USB for simplicity and XLR if you want to build a more flexible studio.
4. Can I start a podcast with a cheap microphone?
Yes. You don’t need an expensive microphone to start a podcast.
Affordable options such as the Fifine AM8 and Samson Q2U can be useful starting points. Focus on microphone placement, room noise, and recording levels before spending more money.
5. Are condenser microphones good for podcasting?
Yes. Condenser microphones can capture detailed voice recordings and work well in quiet recording spaces.
However, they may pick up more background sounds than some dynamic microphones. Consider your room before choosing one.
6. Do I need an audio interface for podcasting?
You don’t usually need an audio interface if you’re using a USB microphone.
However, an XLR microphone needs an audio interface or mixer to connect to your computer. Some XLR microphones may also need a preamp that provides enough clean gain.
7. How close should a podcast microphone be to your mouth?
A distance of around 4 to 6 inches is a useful starting point for many dynamic microphones.
The best distance depends on the microphone and your speaking style. Keep the distance consistent and avoid speaking directly into the mic if plosive sounds become a problem.
8. What is the best microphone for a beginner podcast?
The Samson Q2U is a beginner-friendly option because it supports both USB and XLR connections.
The Fifine AM8 is another option if you want a budget-friendly microphone with a modern design and simple controls.
9. Can I use a gaming microphone for podcasting?
Yes. Many gaming microphones can record podcast audio.
For example, the Fifine AM8 can work for podcasting, streaming, and voice recording. Just check its pickup pattern, connection type, and sound quality before buying.
10. How can I make my podcast microphone sound better?
Start with these simple steps:
- Record in a quiet room.
- Keep the microphone close to your mouth.
- Set the gain correctly.
- Use headphones while recording.
- Reduce echo with curtains, rugs, and soft furniture.
- Edit unwanted noise carefully.
Good microphone technique often matters more than buying a more expensive model.
Final Buying Guide: Which Podcast Microphone Should You Choose?
By now, you’ve seen how different microphones work and what they offer. But if you’re still stuck between several options, don’t worry. The easiest way to choose is to match the microphone to your recording needs.
Here are our final recommendations:
| Your needs | Recommended microphone |
|---|---|
| Best overall flexibility | Shure MV7+ |
| Professional studio recording | Shure SM7B |
| Affordable beginner setup | Fifine AM8 |
| First podcast microphone | Samson Q2U |
| Simple USB recording | Audio-Technica AT2040USB |
| Traditional XLR studio setup | RØDE PodMic |
| Multiple pickup patterns | Blue Yeti |
| Compact USB recording | Sennheiser Profile |
| Spoken-word USB recording | PreSonus Revelator Dynamic |
| Mobile interviews | RØDE Wireless Micro |
Best Overall: Shure MV7+
If you want one microphone that can handle different recording setups, the Shure MV7+ is our leading recommendation.
Its USB-C and XLR connections give you flexibility. You can start with a simple computer setup and move to an audio interface later. It also includes digital features that can help you manage your voice recording.
It’s not the cheapest option, though. If you’re working with a tight budget, the Samson Q2U or Fifine AM8 may make more sense.
Best for Beginners: Samson Q2U
The Samson Q2U is a sensible choice if you’re recording your first podcast.
It offers USB and XLR connections, so you can begin without buying an audio interface. Later, you can connect it to more advanced equipment if your needs change.
It’s a practical microphone for solo shows, interviews, and online content.
Best for Professional Recording: Shure SM7B
The Shure SM7B is worth considering if you’re building a dedicated podcast studio.
It has a strong reputation in broadcast and voice recording. However, you’ll need suitable XLR equipment, and its total setup cost can be much higher than that of a beginner USB microphone.
Don’t buy it just because it’s popular. Make sure it fits your budget and recording space.
Best Budget Option: Fifine AM8
If you want to spend less while getting useful podcast features, take a look at the Fifine AM8.
Its USB and XLR connections make it flexible for the price range. It also includes practical controls for everyday recording.
It’s a good starting point for beginners, streamers, and creators who don’t want to spend too much on their first microphone.
What to Check Before Buying a Podcast Microphone
Before placing your order, take a few minutes to check these details. They can help you avoid buying a microphone that doesn’t fit your setup.
Podcast microphone buying checklist
- Connection: Does it support USB, XLR, or both?
- Microphone type: Is it dynamic or condenser?
- Pickup pattern: Does it suit solo recording or interviews?
- Room conditions: Will it work well in your recording space?
- Accessories: Does the box include a stand, cable, and windscreen?
- Monitoring: Does it have a headphone output?
- Compatibility: Does it work with your computer or recording device?
- Total cost: Have you included the price of any extra equipment?
Where Can You Buy Podcast Microphones?
You can find podcast microphones through online stores, electronics retailers, and professional audio equipment sellers.
If you’re buying in Pakistan, compare local sellers before ordering. Check the exact model, included accessories, warranty, and return policy. Some microphones have different versions or bundles, so don’t assume every listing includes the same items.
For international buyers, official manufacturer stores and established audio retailers are useful places to check specifications and availability.
Also, don’t choose a microphone based on price alone. A cheaper listing may not include the cable, stand, or other accessories you need.
Final Verdict: What’s the Best Microphone for Podcasting?
The best microphone for podcasting depends on your budget, recording space, and the type of show you want to create.
If you want a flexible microphone for both beginner and advanced setups, the Shure MV7+ is an excellent option. Its USB-C and XLR connections give you room to upgrade without replacing the microphone.
If you’re starting with a limited budget, the Samson Q2U and Fifine AM8 are worth considering. Both offer useful features without requiring you to spend a lot on your first setup.
For a dedicated professional studio, the Shure SM7B remains a strong option. And if you prefer a simple USB setup, the Audio-Technica AT2040USB is another model to explore.
Here’s the bottom line: you don’t need the most expensive microphone to make a good podcast. Choose one that fits your room and recording style, position it correctly, and take time to test your audio.
A clear voice and consistent recording setup will take you much further than buying expensive equipment you don’t really need.